|
||
|
|||||||||||||||
|
#21
|
||||
|
||||
|
That looks absolutely awesome.
|
|
#22
|
|||
|
|||
|
Thanks Jonmack
Even though I was supposed to be studying for a math test today I decided to dedicate sometime to the project. I knew when I started this project that I would have to find some way to put a slipper clutch on this since their is no factory slipper clutch for the E4.. though why would their its an on-road car. Since this is an off-road car it has to have a slipper clutch. After looking at different factory slipper clutches I realized I would have to design and build my own. I attempted to make one a couple months ago out of a cut up tc3 aluminum center drive shaft. Everything was going good until I had to thread the threaded rod into the aluminum piece. I used a drill to thread the threaded rod in the aluminum but soon realized the hole was too small. The threaded rod ended up breaking off in the aluminum shaft and the hours of filing went to waste Today I successfully made a slipper clutch out of a aluminum rod I picked up at Home Depot. I spent a few hours "latheing" it down in certain spots by throwing it into the drill press and using a file. I also had to file flat spots in it so the B4 slipper plates would fit. Overall it came out awesome and this has to be one of the nicest pieces I have ever made. Now I won't have to worry about this project coming to dead end becuase their is no slipper clutch.   (I still have to file the motor hole in the chassis) 
|
|
#23
|
|||
|
|||
|
The winter break has given me an opportunity to get some pretty substantial progress made. I also received the parts I need for the rest of the build.
I started by building and installing the E4 diff. This required me to cut a hole under the diff so it can sit fully. While I was at it fully mounted the motor mount and filed the motor slot in the chassis. I currently don't have the diff in the buggy so that I can test the suspension (The a-arm doesn't work with the diff atm) After I got the diff installed and started working on trying to figure out a way to mount the rocker posts for the laydown suspension. I decided on making a custom mount out of 3/8" lexan. With my drill press this was a much easier task then it has been in the past with my hand drill. I measured the angle of the rocker posts on my Evo8 project (Slayer buggy) and matched it. I had to cut a channel in the center of the mount for the belt to go thru.  After I got that all mounted up I moved on to cutting the upper chassis out of 1/8" aluminum. At this point I took a break and decided to do some electrical work so that I could make the center upper chassis. My Promatch Saddle battery packs don't have built in bullet connectors but I like how clean bullet connectors are. So I came up with a solution using Dean connections. I will let a picture speak for this modification. I also used packaging tape to tape the saddles together to make it easier to slide the battery in the buggy. 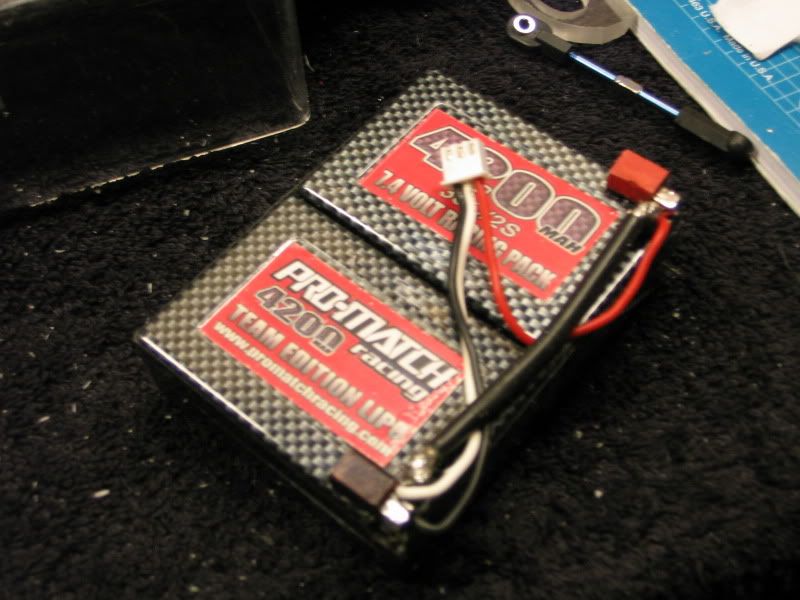 After I cut the battery done I was able to cut the center part of the upper deck out of 1/4" lexan. I had to cut slots out of the lexan for the deans to pass thru as the battery slides into place. I then got the shocks mounts made and mounted them. I made it so I can easily adjust the shocks forward and backwards. Anyway... the pictures explain everything much more clearly. I haven't been able to take all the paper off of the Lexan becuase I still need to cut down the center upper chassis. I think it will look good once all the paper is off. Remember all the aluminum plate parts will be replaced with Carbon down the road. On to the pics...      Oh and a quick picture of the workshop in its current state haha. 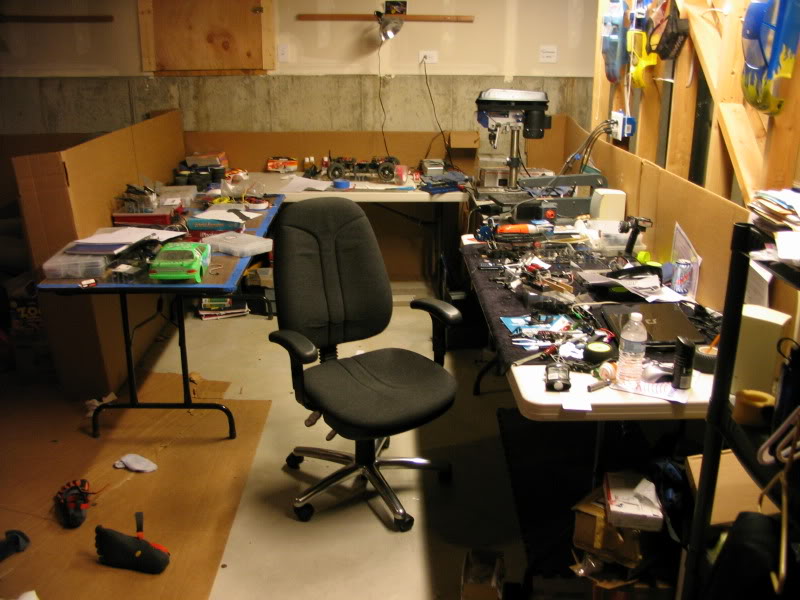
|
|
#24
|
|||
|
|||
|
wooow, what an awsome idea!! keep on building like that you have cool ideas =)
__________________
The difference between genius and stupidity is that genius has itīs limitīs. TLR 22 "1.0" |
|
#25
|
|||
|
|||
|
Thanks man
I have set a deadline for the aluminum proto to done by... No later January 21st. |
|
#26
|
|||
|
|||
|
ok, so hury up !!
Whats missing ītill now?? mainly the front end ?? anything more??
__________________
The difference between genius and stupidity is that genius has itīs limitīs. TLR 22 "1.0" |
|
#27
|
||||
|
||||
|
This is really interesting... proper engineering. I'll be following. Good luck.
|
|
#28
|
|||
|
|||
|
Till: I'm trying to hurry but between school (finals are coming up) , work (mcdonalds), and my girlfriend its tough. As far as whats left... here is my to-do list..
Straighten out upper deck Trim chassis braces Mount front upper deck Draw/cut/mount front shock mounts Straighten out upper a-arm mount Mount rear Turnbuckles Mount front/rear a-arms Mount front/rear hub carriers Make lexan upper a-arms Mount pushrods Make custom cvd bones Mount steering turnbuckles Make wing mount Make rear bumper Install electronics Trim/make body Paint body Mount body Make diff cover Basically a lot of small stuff.. most of it shouldn't take too long. 13 days left.. kaszal: Thanks for the comments I will keep you guys updated. I'm hoping to get some work done on it tomorrow after work. |
|
#29
|
|||
|
|||
|
Wow,
this build is incredible!!! It kinda has the same electronic layout as The Team Losi 22. Can't wait to see the end result!!! What body will go on there? |
|
#30
|
|||
|
|||
|
ok, sounds like the normal problem: making everyone happy,as best as possible ^^
good luck for school finals, but as we can see in technical subjects you shouldnīt need it =) nice work !!
__________________
The difference between genius and stupidity is that genius has itīs limitīs. TLR 22 "1.0" |
|
#31
|
||||
|
||||
|
nothing like the 22, more like the cougar if you wanted to compare it to anything
|
|
#32
|
|||
|
|||
|
B4power: Thanks man. I will be narrowing a Jconcepts B4 body to put on it. I was thinking about putting a 22 body on it... but I believe that could be slightly too narrow.
Till: ah this is true. So hard to please everyone AND do what I want. Thanks. Rcjunky: I would have to agree. My original electronic layout.. was quiet similar to the 22 though. But, I think that this is quiet different then any other car on the market. I've been working on the front end recently. I got the chassis stiffeners trimmed and took the paper off of them. I believe with this design their might be a possibility of having adjustable chassis flex.. by adding or taking away vertical posts in between the two vertical plates. I also got the front upper chassis done. I got a B4 steering rack mounted on it. I was trying to decide between the Gt2 steering rack and B4 steering rack. I decided on the B4 rack because it seems to me that it would create better steering geometry since the width of the buggy will be far less then a Gt2. Also got the rocker posts mounted onto this upper deck. I also mounted some risers to connect the bulkhead to the upper chassis. They extend past the upper chassis because on top of it will be a bulkhead for the upper a-arms. I have to have upper a-arms because of the pivot ball suspension. (I obviously have alot of countersinking to do... my favorite..  ) )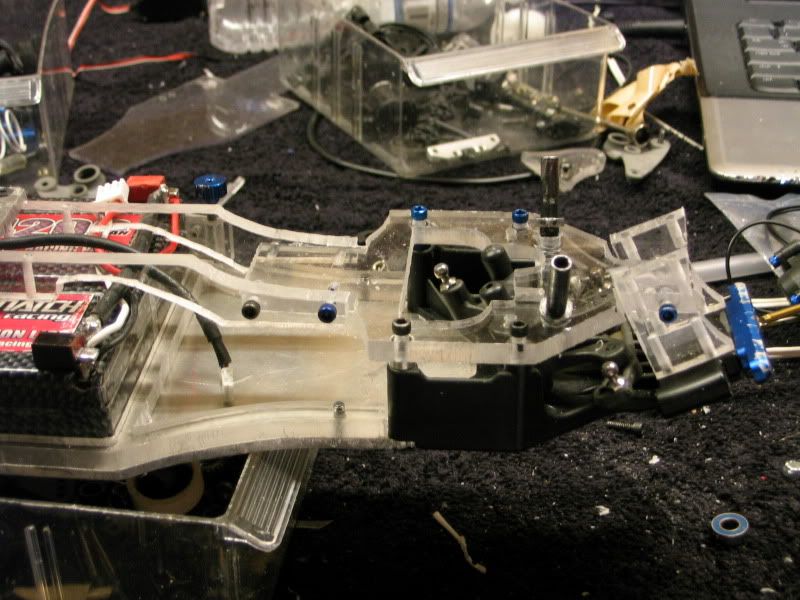 Next up I will be working on mounting the front shocks and rockers. I got the final Solidworks drawing of the Front and Rear a-arms ready for 3d printing and I should have those either monday or tuesday. 12 days till until aluminum prototype deadline! |
|
#33
|
|||
|
|||
|
nice front end !!
I count 6 days now and no update ?? hurry up I wanna see more 
__________________
The difference between genius and stupidity is that genius has itīs limitīs. TLR 22 "1.0" |
|
#34
|
|||
|
|||
|
Here's an update for you =p I will be rapidly giving you guys up dates over the next few days.. I will indeed meet the deadline for this stage and test this friday =)
This is my last week to complete the aluminum prototype. That way I will have enough time to get everything tested and finalized before its debut in the second week of February. I got the printed a-arms from my teacher and they came out nice.. I miss calculated the length.. they of course where to short.. so I lengthened them by adding spacers to the ends which are screwed into the ends of the a-arms. This will put the total width with wheels to about 248mm perfect since legal width is 250mm. With the new a-arms I was able to mount the rear turnbuckles. Once that was done I moved back to the front. I completed the upper a-arm mount. I made it using some 1/8" lexan.. it will be replaced with carbon after the first few tests. I then was able to mount the front a-arms and custom made some upper a-arms out of 1/4" lexan. Lastly, I installed the steering links and put the rockers on. For the front basically I just have some finishing touches like counter sinking, installing matching hardware, adjusting toe and chamber, and I also need to mount the front shocks. I think its coming along very well. I believe I will be able to finish this stage of the build by this Thursday and will take it to the track for testing on Friday. I will be looking for mainly wither or not the car has enough traction and if the a-arms are holding up. If it has enough traction I will cut a Carbon chassis for it and also an upper chassis. So far so good. I think once I get the full finished product done with all the carbon it will look great. 5 days left!!    
|
|
#35
|
|||
|
|||
|
Looking great. It's awesome you could fit in there...waiting for Friday and/or weekend track test
|
|
#36
|
|||
|
|||
|
Thanks
I'm sorry for the late up-date.. Monday my girlfriend wanted to spend some "quality" time together.. soo I had to leave my project for awhile. Yesterday was a frustrating day.. I spent about 5 hours working on what turned out to be the hardest parts to make of the whole project...custom cvd bones. From the last version of this buggy I learned that I could make custom length cvd bones by cutting the drive shaft in half then "fusing" the two halfs together with a lexan tube. With this version custom cvd bones where mandatory because the E4 diff requires E4 cvd ends.. and the axles I'm using require standard Associated cvd ends. I started by cutting the E4 cva's and the Associated Cvd's to correct lengths. That wasn't too hard. I was thinking oh sweet this is going well.. 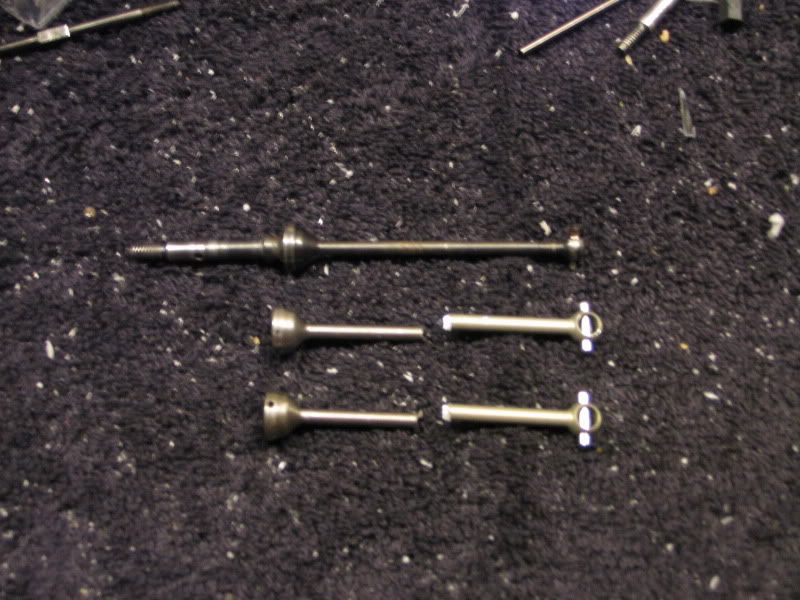 Everything was going good until I came to what proved to be the tough part.. I cut a rectangle out of 1/4" lexan about an inch long and then attempted to drill a straight hole all the way thru it. This proved to be difficult even for my drill press :weird: After probaly 5 or 7 or 10! attempts this way I decided I should try 3/8" lexan. I ditched the drill press and used a hand drill. After a couple attempts I was able to get it right. I then used a vise to quickly press each end of the cvd bone into each end. The hole in the plastic is smaller then the cvd ends.. this makes it so when you force the cvd end into the hole... (Get your head out of the gutter!) :ha: The plastic heats up and then bonds to the metal. 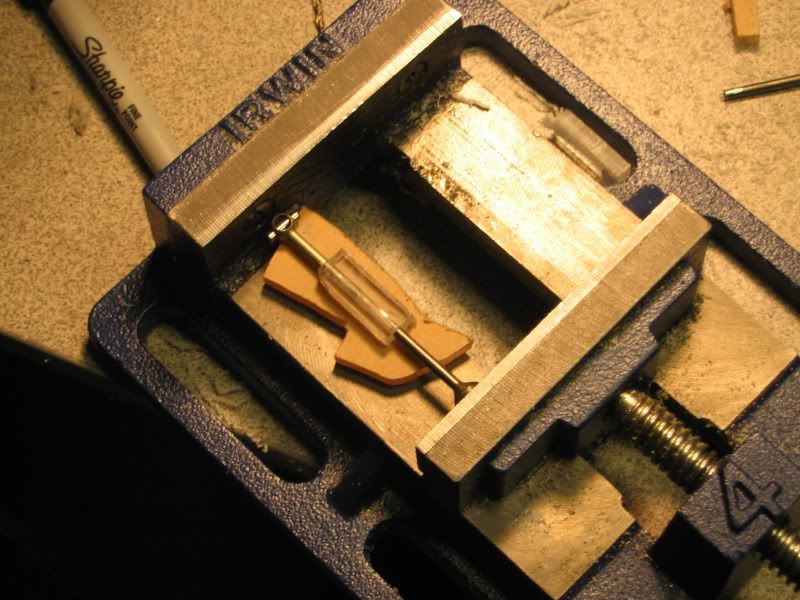 And the finished product.... (I will probably file them a bit more) They aren't pretty and aren't perfect but I'm 99% sure they will work great. 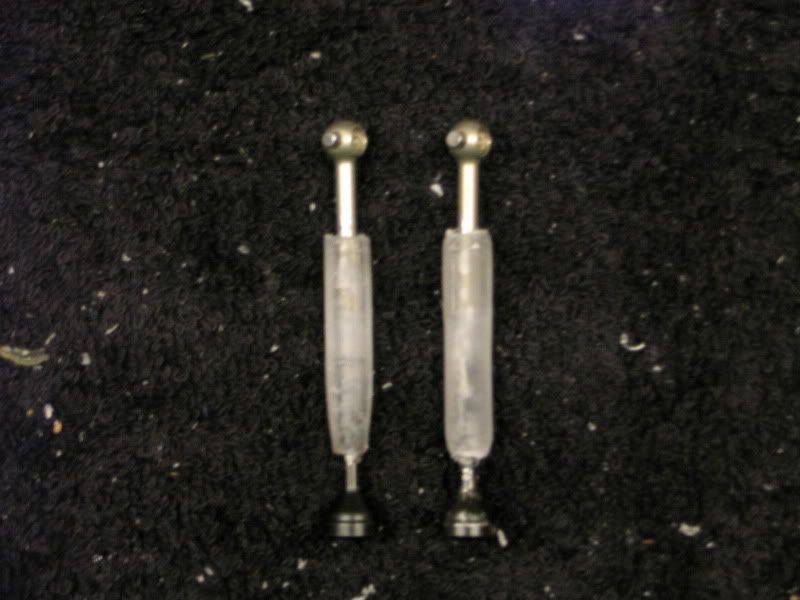 Some other small things I got done is a transponder mount and a dirt cover for the diff. I think the weight of the club transponder could help with traction. Hey.. every gram counts. The dirt cover isn't pretty but I think it should help keep some of the dirt out. And it will be hidden for the most part. 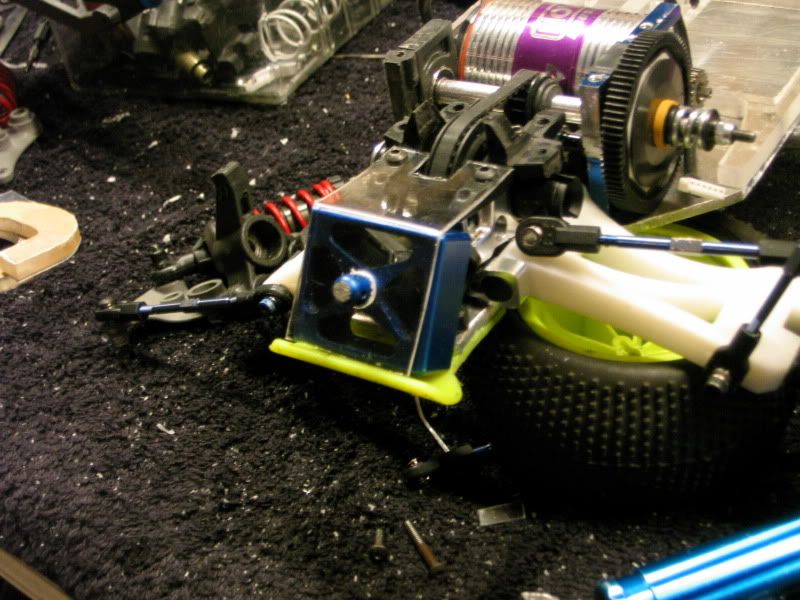 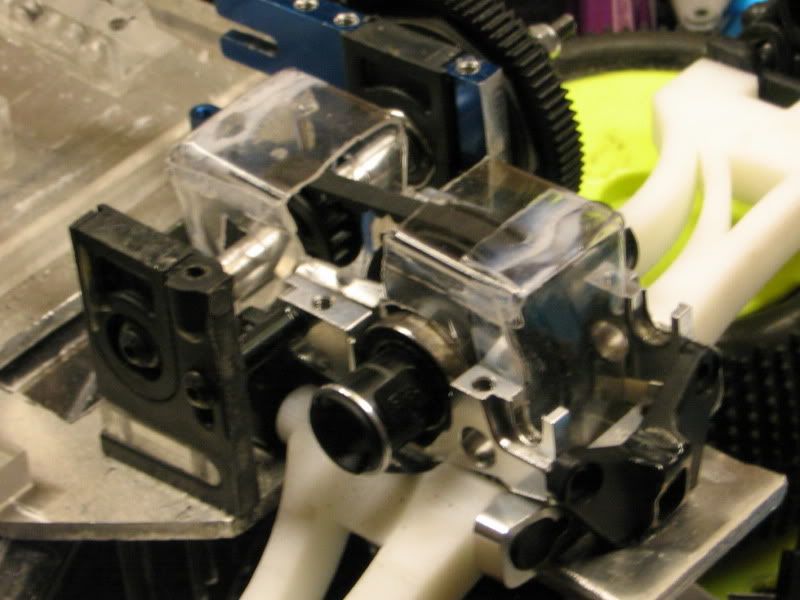 Yesterday was a pretty tough day in the workshop.. but I got the hard stuff out of the way. The workshop is quiet abit of mess.. sorta is a representation of how the day went. 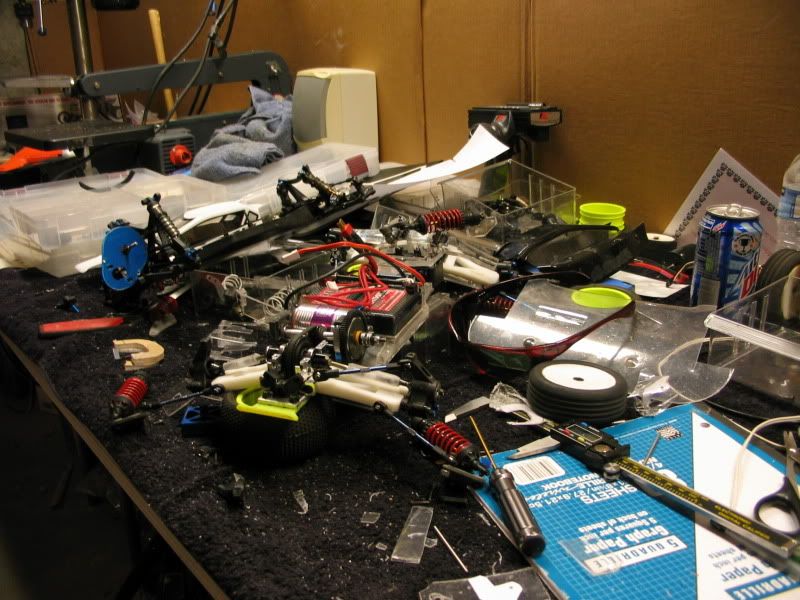 Because of my set-backs.. I'm not sure I will get to test on friday but I will meet my deadline of friday. Testing might have to wait till Sunday. Time for bed. |
|
#37
|
|||
|
|||
|
So guys I got the aluminum proto-version of this buggy done tonight. Remeber.. this prototype is just for testing and tuning. After initial testing and tuning I will be making a Carbon chassis and doing a lot of nice finishing touches to it to make it look really good.
I have it all wired up and ready to go.. actually tonight I took it outside and ran it down the street and checked out how the traction was and how the steering and suspension was working. Everything is working pretty good for the first drive. The suspension is a bit stiff and needs some tuning but thats pretty easy to take care of. The turning and steering work great. I feel like it actually handles well. Traction on asphalt was great but we will have to see how it does on clay. What I'm really happy about is the Slipper clutch and the transmission. Everything with that is working great and it is very quiet. My custom cvds have held up so far. I'm very excited to take it to the track for the first time. I won't get much time but what I will be looking for mainly is wiether or not it has enough traction and also the durability of the a-arms. I will also be taking notes about the suspension, steering, and over all handling. Any way here are some pics.. sorry no on-body pictures until I' done with the final prototype  Oh and yes I am aware that I need to adjust the Chamber on the back. and that I also need to lower the wing. Its way too high.. for some reason I have the hardest time with wings on my projects.. stupid buggies    I will update you guys tomorrow night with out the track testing goes =) |
|
#38
|
|||
|
|||
|
It's going well, for the looks of it...You need a lathe to make straight holes without fuss
|
|
#39
|
|||
|
|||
|
Itīs an awsome car !!!! Very very nice work!
What about an application to Team Asso or Team Losi as an Constructor :P Keep on going like that and stay hat creative!! cheers
__________________
The difference between genius and stupidity is that genius has itīs limitīs. TLR 22 "1.0" |
|
#40
|
|||
|
|||
|
I wish I had a lathe.. that would make things alot easier
Till: thanks haha I actually am going to college for Mechanical Engineering and do plan on applying for a mechanical engineering job at Losi and Associated down the road. Unfortunately, today was not such a good day at the track.. within the first minute or two a front a-arm broke. I accidently ran into a pipe and I didn't feel like it hit it very hard at all. But the a-arm broke around the hinge pin hole so these 3d printed a-arms are definatly not strong enough to be used. I put another a-arm on but the same thing happened just as quickly.  It was hard to tell how the traction was but it seemed to have quiet abit. Everything else I wasn't really able to test becuase I only got to drive it for a couple minutes. So it was a waste of time.. but its definatly better to work out these things now then race day. However I did weigh it at the track...ready to run it weighed in at 1805 grams. So about 300grams heavier then the minimum. This is definatly something I'm going to be wanting to lower. I think a carbon chassis will help. What now? well I have to figure out a way to make new a-arms out of a stronger material. I'm thinking about making "hybrid" a-arms by cutting up B4 a-arms and bolting them to 3/8" lexan pieces that determine the length and hold the pivot balls. The other option is to attempt to cut them out of 3/8" lexan or delrin. Making a-arms is pretty hard to do accurately.. perhaps I will find some place to mill them out of delrin... I'm not sure.. but what I do know is that time is ticking and I need to get this thing back out on the track. |
 |
|
|