Go Back   oOple.com Forums > Car Talk > Team Durango

Reply
 
Thread Tools Display Modes
  #101  
Old 16-10-2011
mikeyscott's Avatar
mikeyscott mikeyscott is offline
Spends too long on oOple ...
 
Join Date: Mar 2009
Location: Hampshire
Posts: 7,223
Default

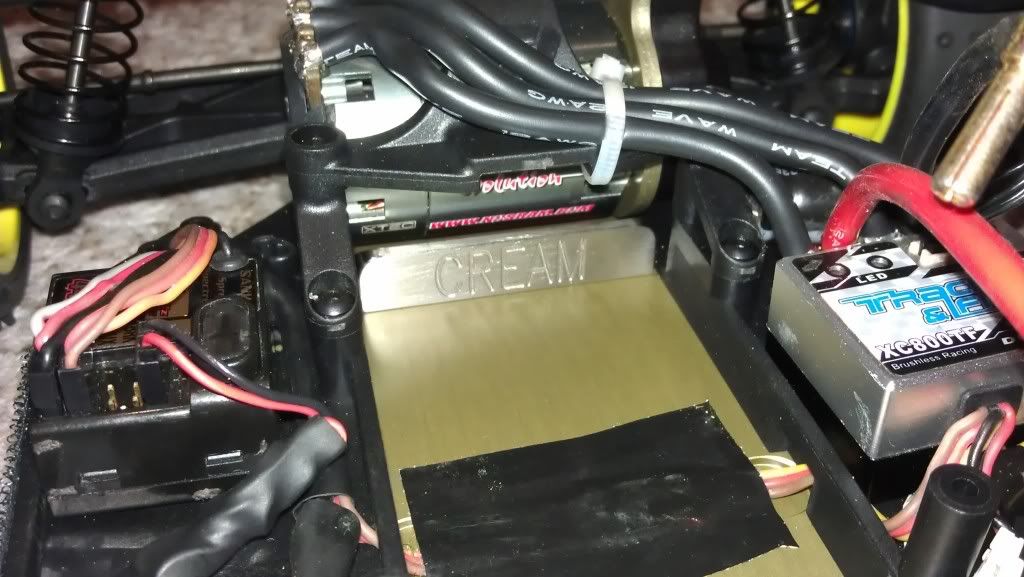
I haven't decided what side to mount the ESC.
Reply With Quote
  #102  
Old 16-10-2011
sly's Avatar
sly sly is offline
Mad Member
 
Join Date: Jul 2007
Location: On earth somewhere
Posts: 1,110
Default

Noel of Cream rc is making these 24grams direct replacement stainless steel weights for the stock plastic parts front and back of the cells, extra but of bling but also could be used as a tuning aid
__________________
Trader feedback:-http://www.oople.com/forums/showthread.php?t=78095

It was once said to me, if you light the blue touch paper you need to stand well back[/CENTER]
Reply With Quote
  #103  
Old 17-10-2011
kabilay's Avatar
kabilay kabilay is offline
Member
 
Join Date: Aug 2010
Posts: 88
Default

Quote:
Originally Posted by jonathan may View Post
speedpassion gt2.0?
SP 2 from another angle from Tresrey Blog
http://tresreyblog.com/?month=201110...d2972b4aafce51
Attached Images
File Type: jpg 20111014_2146992.jpg (56.6 KB, 457 views)
Reply With Quote
  #104  
Old 17-10-2011
sheddy's Avatar
sheddy sheddy is offline
Senior Member
 
Join Date: Aug 2010
Location: Kent
Posts: 532
Default

Got my speed passion GT2 in. fitted fine, just waiting for new wire to turn up
Attached Images
File Type: jpg DSCF0084.jpg (364.7 KB, 315 views)
Reply With Quote
  #105  
Old 17-10-2011
jonathan may's Avatar
jonathan may jonathan may is offline
Senior Member
 
Join Date: Mar 2011
Location: plymouth
Posts: 825
Default

Were can I get the smaller so power cap
Reply With Quote
  #106  
Old 17-10-2011
mikeyscott's Avatar
mikeyscott mikeyscott is offline
Spends too long on oOple ...
 
Join Date: Mar 2009
Location: Hampshire
Posts: 7,223
Default

MMM LPF with the small capacitor.

The LPF capacitor? Schumacher are the distributors for SP gear, so have a look on their website www.racing-cars.com
Reply With Quote
  #107  
Old 17-10-2011
Dazzler's Avatar
Dazzler Dazzler is offline
Senior Member
 
Join Date: Nov 2008
Location: Telford
Posts: 902
Default

Quote:
Originally Posted by kabilay View Post
SP 2 from another angle from Tresrey Blog
http://tresreyblog.com/?month=201110...d2972b4aafce51
Mid motor, rear mounted shocks, interesting...
Attached Images
File Type: jpg 20111014_2146992.jpg (56.6 KB, 338 views)

Last edited by Dazzler; 17-10-2011 at 01:00 PM. Reason: To Add the actual pic.
Reply With Quote
  #108  
Old 17-10-2011
Origineelreclamebord's Avatar
Origineelreclamebord Origineelreclamebord is offline
Mad Member
 
Join Date: Sep 2010
Location: Netherlands
Posts: 1,571
Default

Click here for my build thread I have on Tamiyaclub I find it a very inspiring design, so it's worth sharing it with the Tamiya fanbase. May it serve as an inspiratin to do more innovative designs than the TRF201 Even if that is a lovely bit of kit as well!
Reply With Quote
  #109  
Old 17-10-2011
losichris losichris is offline
Senior Member
 
Join Date: Nov 2006
Location: Chorlton,Manchester
Posts: 870
Default

Quote:
Originally Posted by Origineelreclamebord View Post
Click here for my build thread I have on Tamiyaclub I find it a very inspiring design, so it's worth sharing it with the Tamiya fanbase. May it serve as an inspiratin to do more innovative designs than the TRF201 Even if that is a lovely bit of kit as well!
Hurry and do the diff! im having a nightmare with mine...keeps slipping!
Reply With Quote
  #110  
Old 17-10-2011
Marc0 Marc0 is offline
Member
 
Join Date: May 2011
Posts: 59
Default

Build finished, will do electronic tomorrow :


Reply With Quote
  #111  
Old 18-10-2011
OneKiwi's Avatar
OneKiwi OneKiwi is offline
*SuPeRsTaR mEmBeR*
 
Join Date: Jun 2010
Location: Sweden but from New Zealand
Posts: 2,033
Default

where did you get the nice red stuff from?
__________________
oOple feedback
Ebay feedback

"Babe thats NOT the price its the serial number!!"
Reply With Quote
  #112  
Old 18-10-2011
Origineelreclamebord's Avatar
Origineelreclamebord Origineelreclamebord is offline
Mad Member
 
Join Date: Sep 2010
Location: Netherlands
Posts: 1,571
Default

Quote:
Originally Posted by OneKiwi View Post
where did you get the nice red stuff from?
Lower caps from dampers are the 'standard' alu ones featured on the DESC410R's big bore shocks for example. The red washers may be Tresrey?

Quote:
Originally Posted by losichris View Post
Hurry and do the diff! im having a nightmare with mine...keeps slipping!
I read some people are having trouble with it yeah, I'll read through the 'issues' topic first to see what problems people are having. I'll put some extra attention into building the diff, and try to show what steps need to be taken to build the diff correctly - though it is a first time I'm building this diff too, so I can't promise I'll do it right the first time

Mr.Skelding's advice may help though, it makes sense, so I'll be off to get me the circlip pliers. It can be done without, but the chance of damaging the circlip is pretty high then, which could explain the trouble everyone is having.

Quote:
Originally Posted by Adam Skelding View Post
I'll try and clear a couple of issues up on here:

1. Shocks shafts are correct in the kit. Just make sure you have fitted the rubber bumpstop onto the shock shaft before you fit the rod end.. Also once the spring perch is on there the piston doesn't break the top of the body.

We've had no issues throughout testing with shocks sticking at full compression.

As for the option part page, the 52mm shaft shouldn't be listed there. I'll get it removed today. It's also in the manual...

2. Diff - Circlip. It's best to install the circlip with some good Circlip pliers. It can be rendered useless if you try and force it in... A few tips here to help ensure your diff is built correctly.
a. There are two sides to the clip a flat side and a rounded side. When you install the circlip keep the 'flat' side facing you this way when under pressure from the thrust race the contact faces between the clip and the diff ring are the flat ones.

b. One the circlip is installed. Try to open it out a little either with the circlip pliers you just installed it with. Or insert a large flat blade screw driver between the open ends of the circlip and give the screwdriver a twist, this will open the circlip back out a little removing any 'shrinkage' of the clip on installation.

c. Make sure you put in the diff screw and T-nut in the correct sides. It builds differently to other diffs out there. Don't just build it 'the way you have been building ball diffs for 20 odd years'.

3. Breakages.
Shock Towers
These are always hard ones to justify... Sometimes when you break something you only see the end result of part that has already been weakened. We broke towers in testing and in racing, but TBH they were justified. We have towers from the production batch and the mix is good.

Steering.
Honestly, we never saw a broken one of these during testing, it must have been a really hefty hit.. We even did some testing at Coventry so we know what to expect from the track.
Reply With Quote
  #113  
Old 18-10-2011
Big G's Avatar
Big G Big G is offline
*SuPeRsTaR mEmBeR*
 
Join Date: Apr 2009
Location: Lincoln
Posts: 2,696
Send a message via MSN to Big G Send a message via Skype™ to Big G
Default

Quote:
Originally Posted by Dazzler View Post
Mid motor, rear mounted shocks, interesting...
only the mounts on the tower are on the back. wishbones are still the 'right' way round. could just be an error in the build lol
Reply With Quote
  #114  
Old 18-10-2011
Dazzler's Avatar
Dazzler Dazzler is offline
Senior Member
 
Join Date: Nov 2008
Location: Telford
Posts: 902
Default

Quote:
Originally Posted by Big G View Post
only the mounts on the tower are on the back. wishbones are still the 'right' way round. could just be an error in the build lol

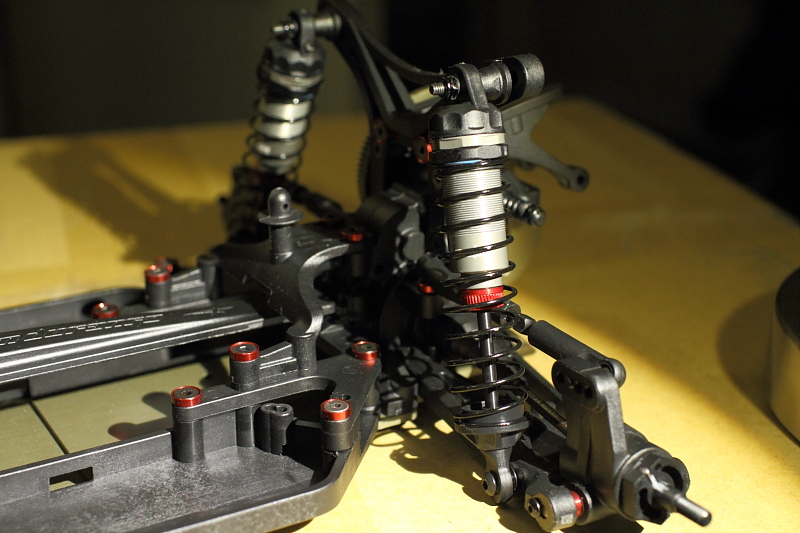
I've thought about it a little more, and think it's probably part way through a rear motor to mid motor change..
Reply With Quote
  #115  
Old 18-10-2011
SHY's Avatar
SHY SHY is offline
Mad Member
 
Join Date: Feb 2007
Location: Oslo, Norway
Posts: 1,652
Default

Quote:
Originally Posted by Diesel View Post
Just finished my colors
Wow! Very original & cool paintjobs there man!!! Done yourself?

And what shell is that cab forward on the DEX410?
__________________
Life's too short to go slow! www.ymr.no

Tech Tips, HopUps & Bling

Xray 2014 XB4 4WD & 2WD | B4 FTW Night Fox XL | Mugen MRX-5 | RB | Futaba 3VCS FASST | Faskolor

Visit my showroom
Reply With Quote
  #116  
Old 18-10-2011
hottuna hottuna is offline
Member
 
Join Date: Jun 2009
Location: Sweden
Posts: 200
Default

I can't understand i haven't seen one car yet here with motor cables long enough to swap to RM
It's the main idea of this construction, to be able to rebuild quick between two practice heat. I think this "race" of nicest install makes people forget about this.
__________________
Durango DEX210
Durango DEX410R
Blog
Reply With Quote
  #117  
Old 18-10-2011
Big G's Avatar
Big G Big G is offline
*SuPeRsTaR mEmBeR*
 
Join Date: Apr 2009
Location: Lincoln
Posts: 2,696
Send a message via MSN to Big G Send a message via Skype™ to Big G
Default

the SP V3 has plugs so I could make up extensions to run RM setup. Just need to also make all little bracket so no shorting can happen
Reply With Quote
  #118  
Old 18-10-2011
OneKiwi's Avatar
OneKiwi OneKiwi is offline
*SuPeRsTaR mEmBeR*
 
Join Date: Jun 2010
Location: Sweden but from New Zealand
Posts: 2,033
Default

Quote:
Originally Posted by hottuna View Post
I can't understand i haven't seen one car yet here with motor cables long enough to swap to RM
It's the main idea of this construction, to be able to rebuild quick between two practice heat. I think this "race" of nicest install makes people forget about this.

I think that people choose what they want to drive and stick with that, and that soldering new wires doesn't take that long, I think that most have a solder iron and wires in their kit bags anyway.

The hardcore just have 2 cars one in each configuration
__________________
oOple feedback
Ebay feedback

"Babe thats NOT the price its the serial number!!"
Reply With Quote
  #119  
Old 18-10-2011
mikeyscott's Avatar
mikeyscott mikeyscott is offline
Spends too long on oOple ...
 
Join Date: Mar 2009
Location: Hampshire
Posts: 7,223
Default

Quote:
Originally Posted by hottuna View Post
I can't understand i haven't seen one car yet here with motor cables long enough to swap to RM
It's the main idea of this construction, to be able to rebuild quick between two practice heat. I think this "race" of nicest install makes people forget about this.
Due to the track surfaces I race on I'll be leaving it in a MM4 config.
Reply With Quote
  #120  
Old 18-10-2011
hottuna hottuna is offline
Member
 
Join Date: Jun 2009
Location: Sweden
Posts: 200
Default

Quote:
Originally Posted by OneKiwi View Post
I think that people choose what they want to drive and stick with that, and that soldering new wires doesn't take that long, I think that most have a solder iron and wires in their kit bags anyway.

The hardcore just have 2 cars one in each configuration
Well, everyone choose what they want
The main reason i bought the car (other than it's a Durango ) is that i want to be able to change it from RM to MM at races. If you go to a track you have never raced on, do you rely on what other ppl say, or do you want to test what's best for you.

I wouldn't like to pick up the soldering gear, maybe even take out the ESC and make good soldering + rebuild in about 30 min.

I have 2 cars, but will only use 2 rear ends to swap quickly.
__________________
Durango DEX210
Durango DEX410R
Blog
Reply With Quote
Reply

Thread Tools
Display Modes

Posting Rules
You may not post new threads
You may not post replies
You may not post attachments
You may not edit your posts

BB code is On
Smilies are On
[IMG] code is On
HTML code is Off

Forum Jump


All times are GMT. The time now is 01:41 PM.


Powered by vBulletin® Version 3.8.7
Copyright ©2000 - 2024, vBulletin Solutions, Inc.
oOple.com